Onboarding & Membership
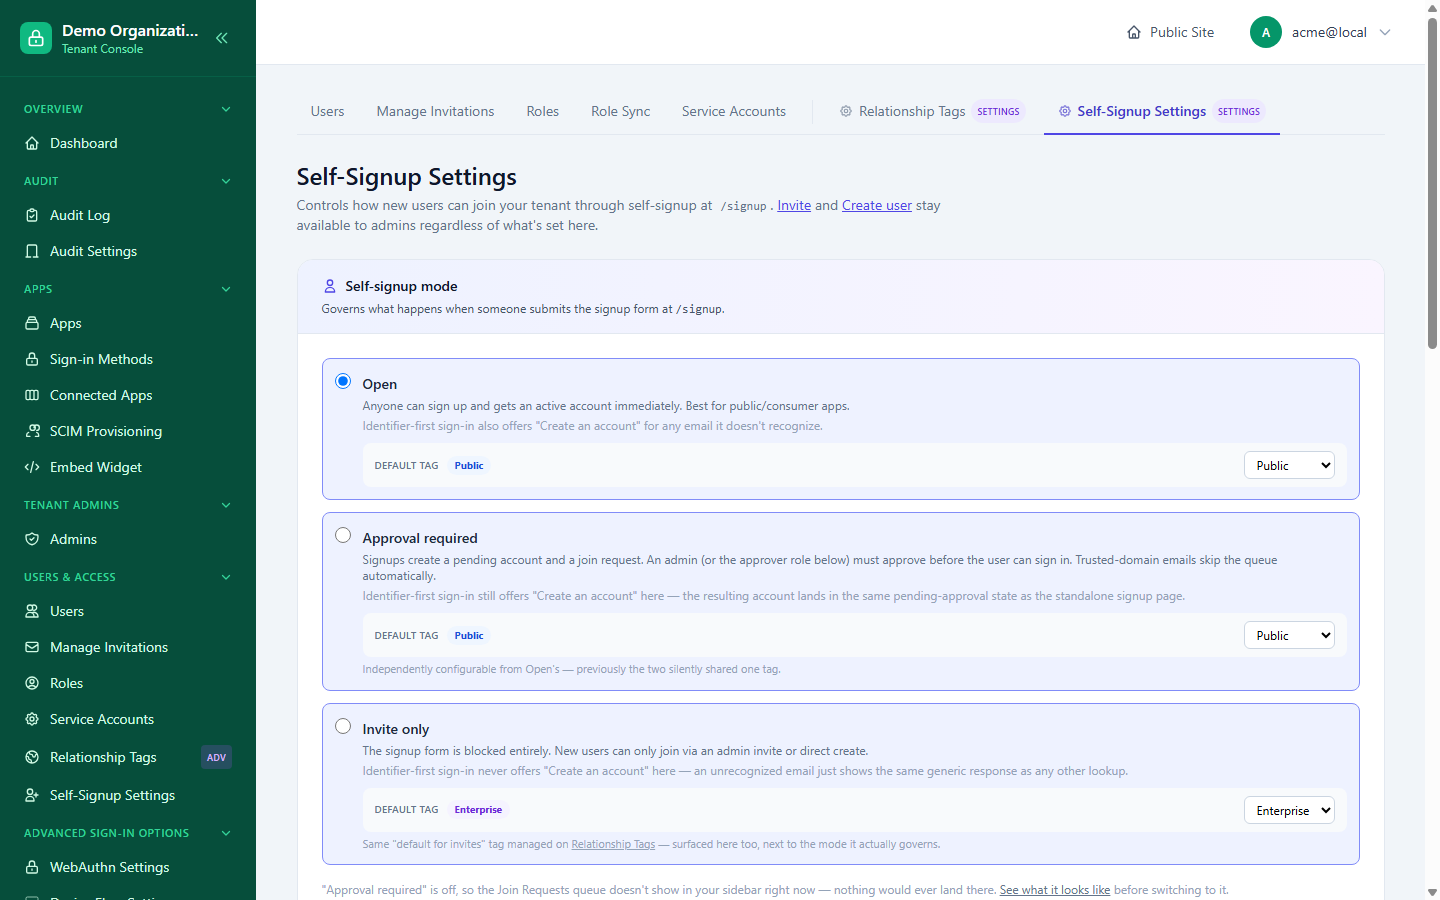
This page covers how someone becomes a member of your organization in the first place — before roles, apps, or any of that matters. Console → Self-Signup Settings governs self-signup at /signup; it has no effect on Console → Users → Create or → Invite, both of which always work regardless of this setting.
The three onboarding modes
| Mode | What happens when someone tries to self-sign-up |
|---|---|
| Open | They're created immediately and can sign in right away. |
| Approval Required | Their account is created with a pending_approval status, and a tenant admin must approve or deny it (see Join Requests) before they can sign in. |
| Invite Only | Self-signup is closed entirely — someone can only join via a direct admin invitation. |
Each mode has its own default Relationship Tag applied to whoever joins through it, settable independently — so, for example, an approval-required signup can land with a different self-service policy than an open one. A trusted domains list lets you optionally require a self-signup email to match an approved domain, and request expiry controls how long a pending approval-required request stays open before it lapses (14 days by default).
An individual app can further restrict or adjust self-signup on top of this tenant-wide setting — see Apps & Connectors.
Reviewing join requests
Only relevant in Approval Required mode. Console → Join Requests is the pending queue; the stats at the top show pending/approved/denied counts. If your organization isn't currently in this mode, the queue page can still be previewed (from the Self-Signup Settings page) so you can see its shape before turning the mode on.
Opening a request shows everything the person submitted, including any custom profile fields your signup form collects, and gives you two independent notes to attach to your decision:
- Public note — visible to the requester (e.g. shown in their rejection or approval notice).
- Internal note — visible only to your organization's admins.
Approve activates the account immediately; Deny leaves it rejected. Both actions are attributed to the deciding admin and recorded with the notes you entered.
Inviting someone directly
Console → Users → Invite creates a direct, single-use invitation regardless of your onboarding mode — this is always available as a way to bring someone in by hand. Console → Manage Invitations is where you manage the ones you've sent:
- Filter between pending-only and all (including accepted, revoked, and expired).
- Resend — for a still-pending or already-expired invite, regenerates the token, extends the expiry, and re-sends the email. If the email fails to send, the fresh invitation link is still shown so you can share it manually.
- Revoke — invalidates a pending invitation; it can no longer be accepted.
An invitation that's already been accepted or revoked can't be resent.
Related reading
- Roles & Relationships — Relationship Tags and their self-service policy effect on whoever joins.
- Managing Users — what happens to an account once it exists.
- Apps & Connectors — per-app self-signup overrides.