Creating an Organization
An organization (a tenant) is a separate workspace with its own users, apps, roles and data. Anyone can start one at /signup-tenant — the person who does becomes its first administrator.
The page is a short, guided flow. Your platform administrator controls parts of it — see Signup Security if you run the instance.
The steps
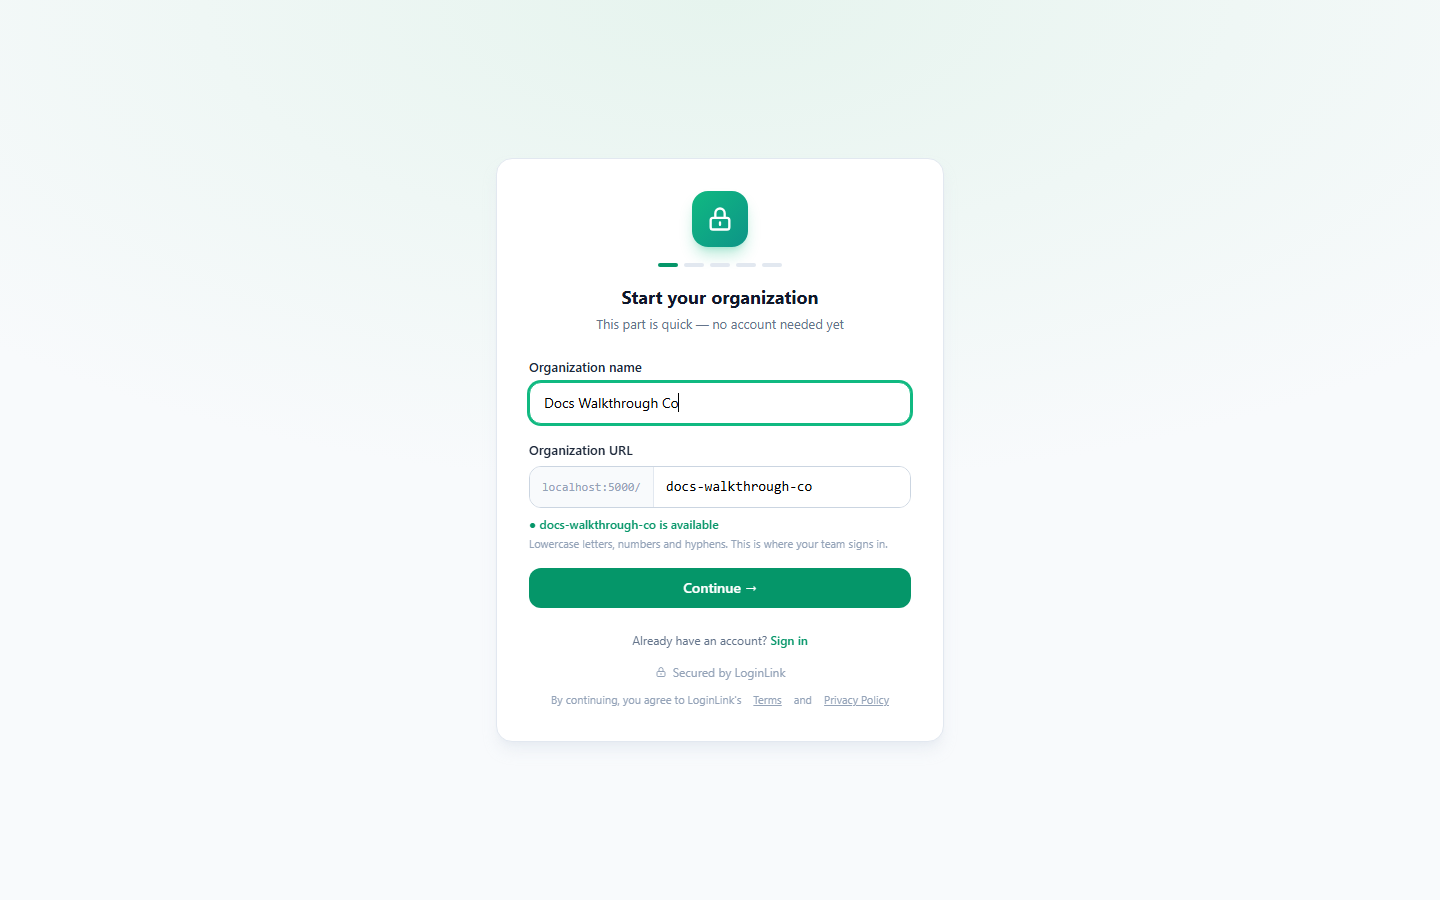
1. Organization
- Organization name — how the organization is shown.
- Organization URL — where your team signs in, for example
your-host/acme-corp. It's suggested from the name and checked automatically as you type; you'll see whether it's available before you continue.
URLs use lowercase letters, numbers and hyphens (2–40 characters). Some names are reserved, and a URL that's already taken is reported to you — LoginLink never changes it behind your back.
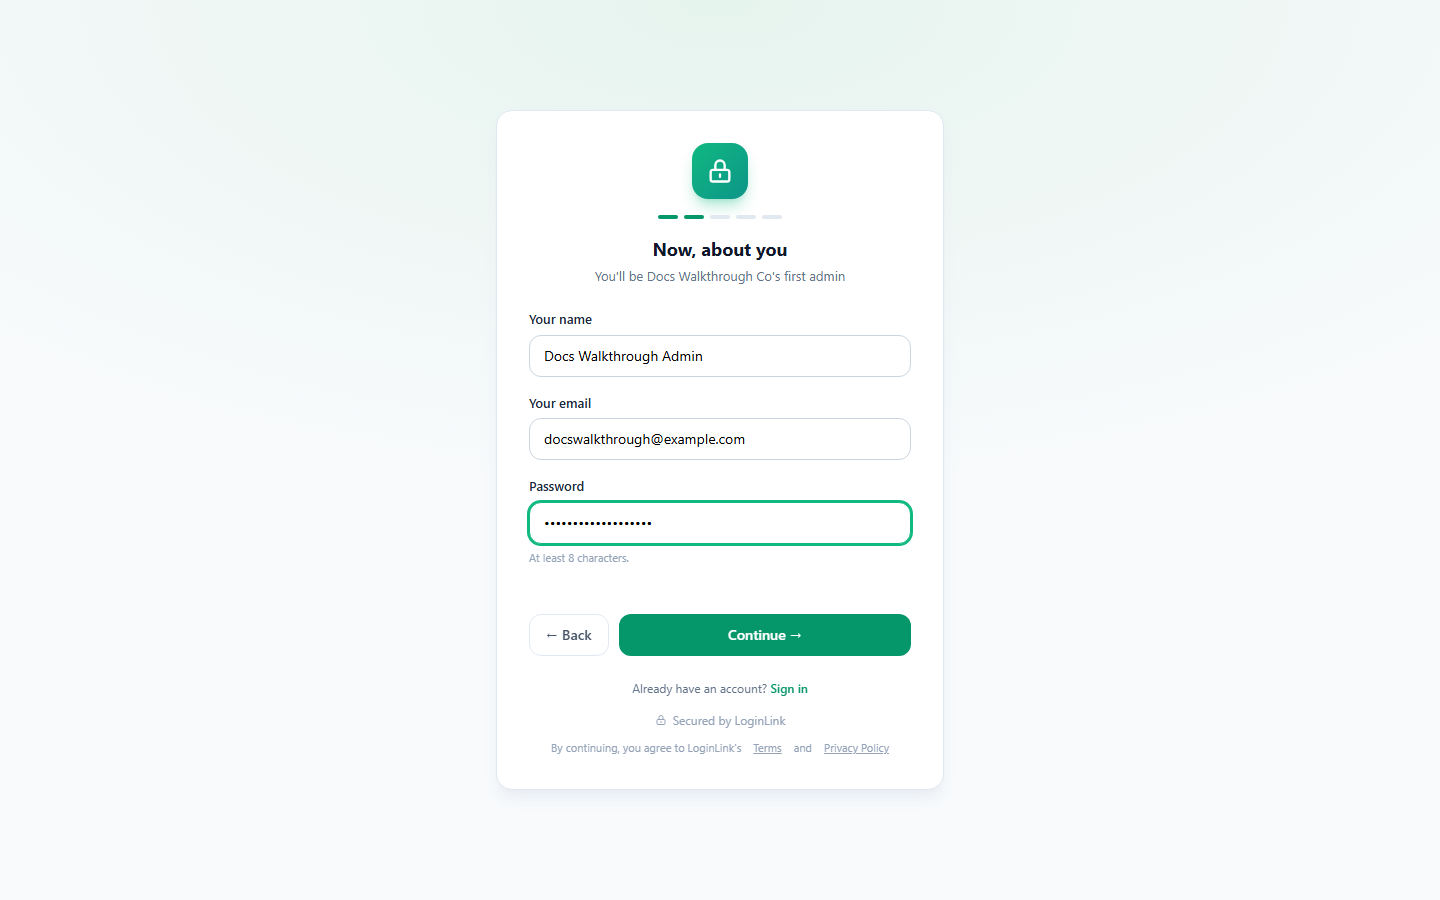
2. About you
Your name, email and a password that meets the platform's password policy. You'll sign in to the organization's console with these.
3. Verify your email (only if required)
If your platform administrator requires verification, you'll be sent either a code to type in, or a link to click — whichever they've set up. With a link, this page continues by itself once you click it, even on another device. You can resend it (after a short wait) or go back and change the email.
If verification isn't required, this step doesn't appear.
4. Where should your data live?
| Option | When to choose it |
|---|---|
| SQLite (platform-managed) — recommended | Zero setup; LoginLink creates and manages the database. Fine for evaluating or a small team. You can migrate to MySQL or PostgreSQL later from Console → Database & Migration. |
| MySQL or PostgreSQL — your own server | You operate and back up the database. Enter its host, port, database name, username, password and SSL mode, then use Test connection — it's tested again before anything is created. The database must be empty; signup can't attach to one that already has data. |
| Auto-provision it | Available to approved organizations only. LoginLink creates a dedicated database for you — nothing to enter. If your email isn't approved, the option is shown greyed out; contact your platform administrator to be added. |
You can also add links to your own Terms of Service and Privacy Policy, shown on your organization's sign-in page (optional unless your platform administrator requires them).
5. You're set
A confirmation shows your organization's URL (with a copy button), where it was created, and the administrator account. Choose Go to console to continue — you're already signed in as its first administrator.
For a MySQL, PostgreSQL or auto-provisioned database, a progress screen shows the database being prepared before you're signed in.
If something goes wrong
- A URL is taken — you're returned to the first step with a clear message; choose another.
- The database connection fails — the page tells you what failed; fix the details and retry. Nothing is created until the connection works.
- Provisioning fails part-way — anything already created for your attempt is cleaned up, and your details are kept so you can retry.
Next steps
- Invite teammates and register your first app from the console.
- Automate the rest with the Management API or SCIM.
Frequently asked questions
Can I change the organization URL later? The URL is chosen at signup. If you need a different one, ask your platform administrator — it also affects the sign-in links you've shared.
Why is "Auto-provision it" greyed out? It's available only to organizations your platform administrator has approved in advance, matching the exact email you entered. See Database Auto-Provisioning.
Can I start on SQLite and move later? Yes — choose MySQL or PostgreSQL later from Console → Database & Migration. See BYO-DB / Data Residency.
I lost the verification email. Use Resend on the verify step (available after a short wait), or go back and correct the address if it was mistyped.